Create a grid
This is the main workflow: pick a market, define the grid, optionally backtest it, add safety, and start. The configuration panel is on the right; the chart on the left shows your levels and lets you drag them.
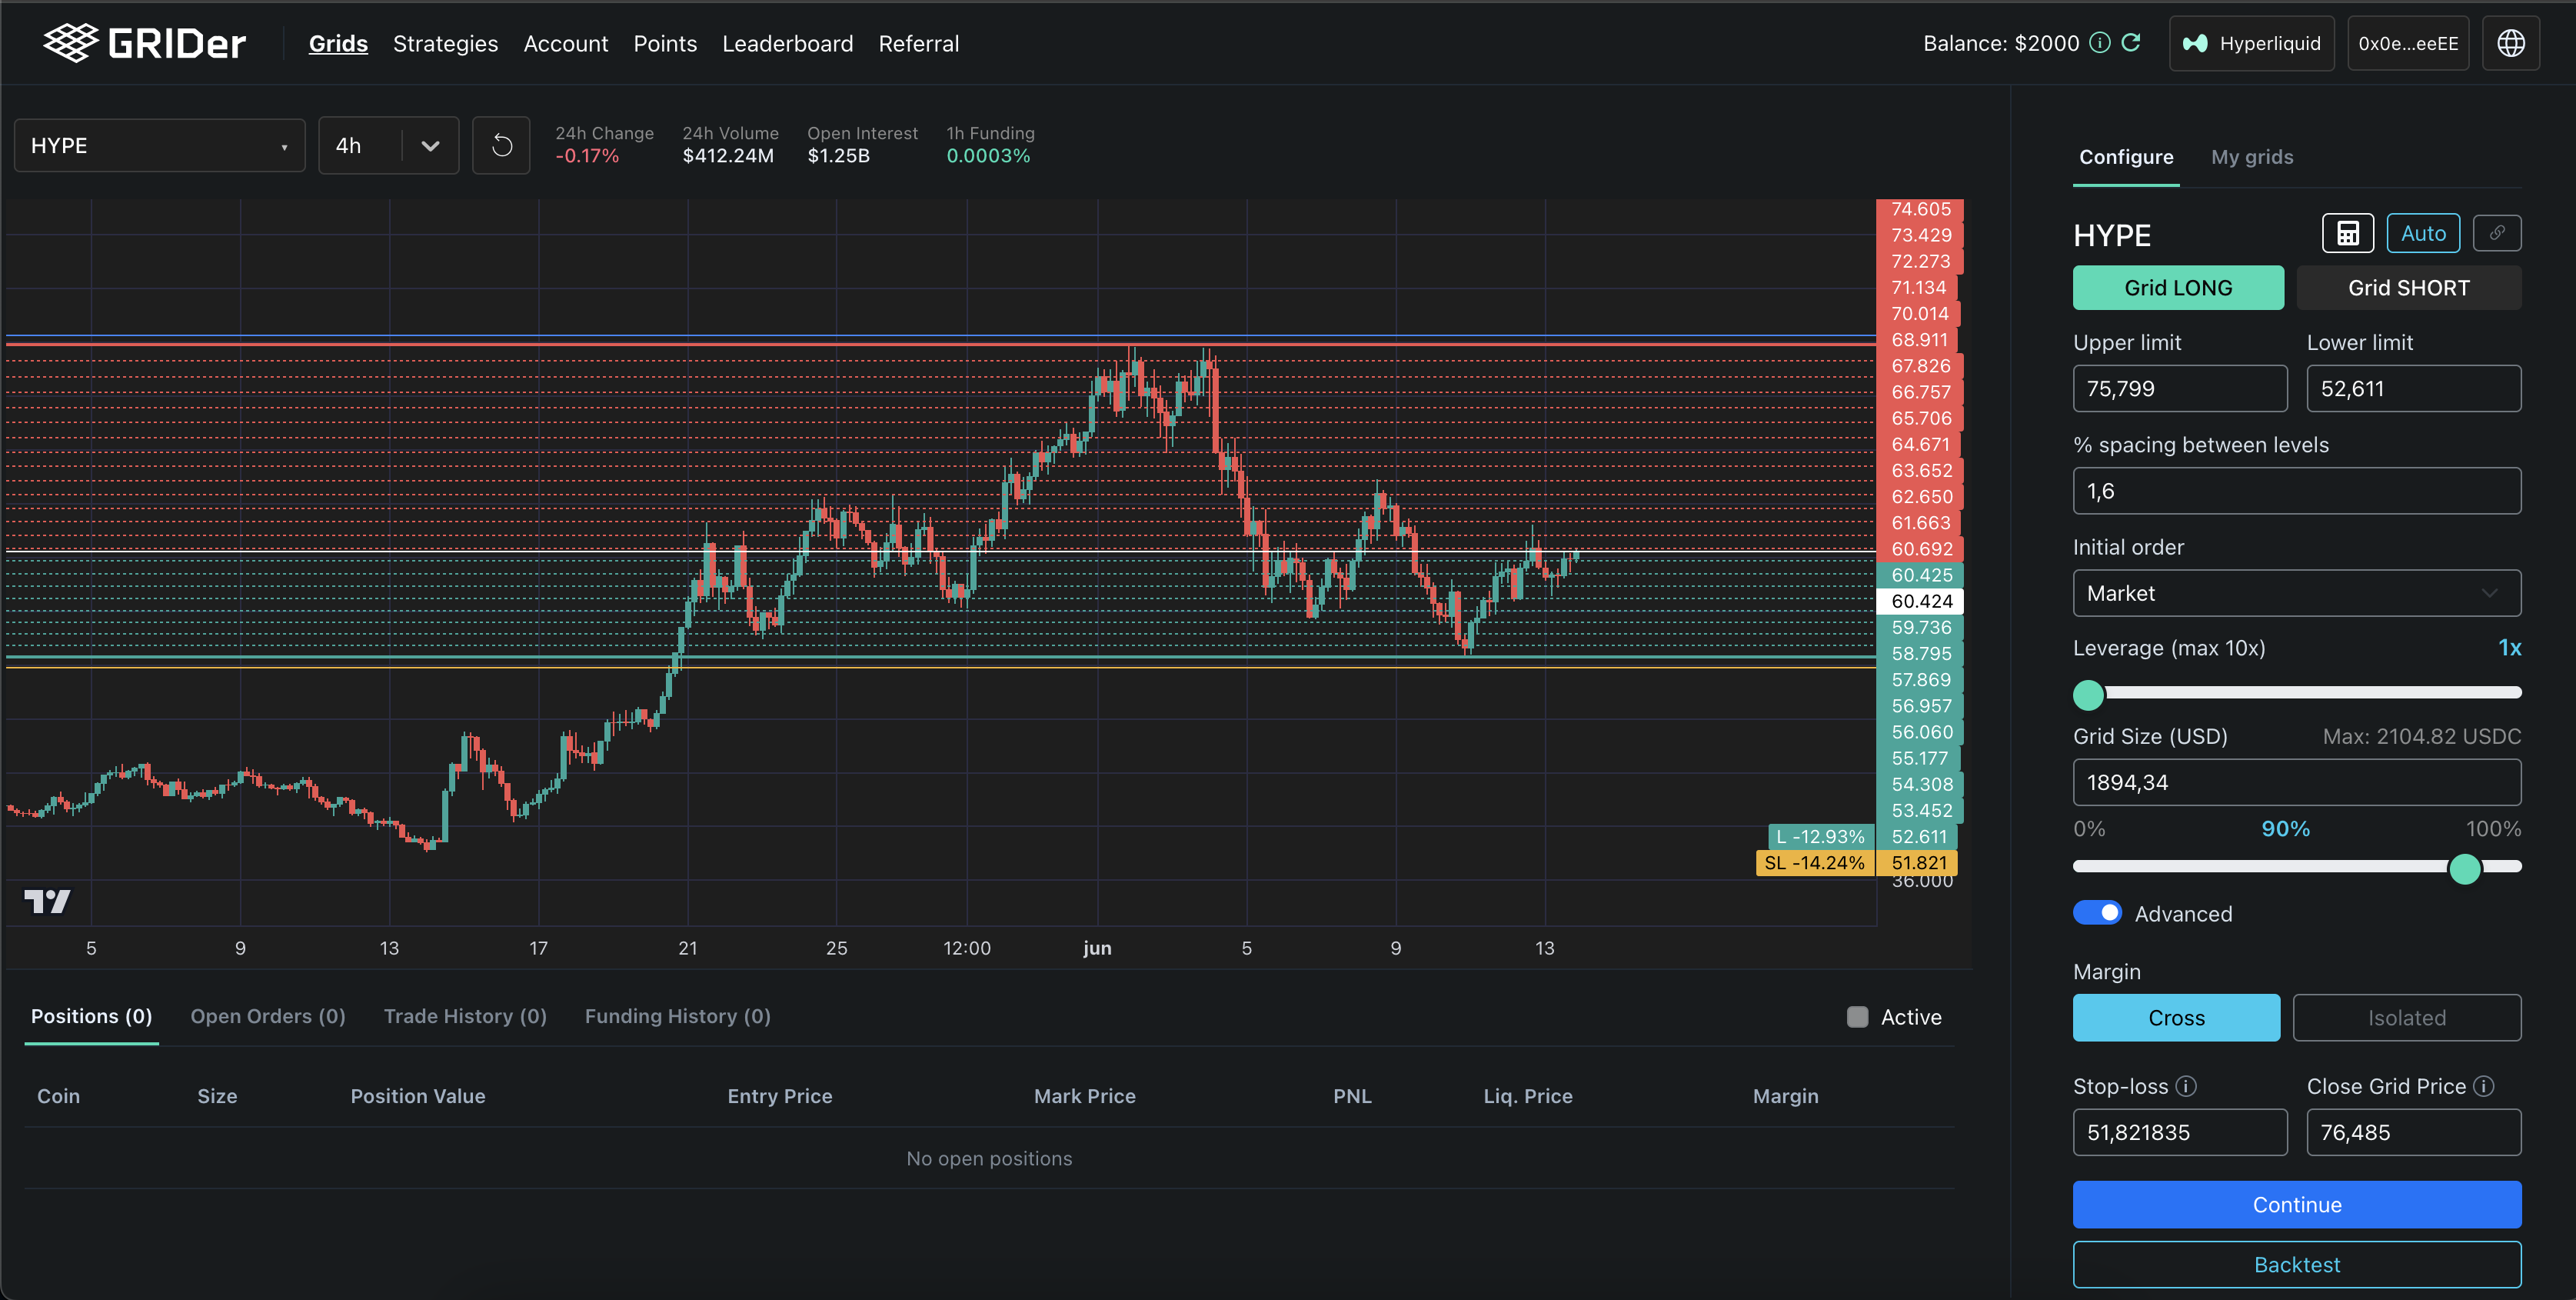
1. Choose a market and direction
Pick a token from the selector. Choose a direction:
- Grid LONG — biased to accumulate long as price falls through the range.
- Grid SHORT — biased to accumulate short as price rises through the range (perps only).
2. Set the range and levels
| Field | Meaning | Tip |
|---|---|---|
| Upper limit | Top of the range. | Place it where you expect price to stall on the way up. |
| Lower limit | Bottom of the range. | Place it where you expect support. |
| % spacing between levels | Gap between levels. | Tighter = more, smaller trades; wider = fewer, larger trades. |
| Grid Size (USD) | Total capital for the grid. | Keep each level comfortably above the exchange's per-order minimum (~10 USDC on Hyperliquid). |
Prefer a head start? Click Auto and GRIDer proposes a range from the last 7 days. You can then adjust everything by hand.
The chart shows your Range, the individual Levels, and the current price. You can drag the limit lines directly on the chart to set them visually — useful for lining the range up with recent structure.
3. Leverage (perps)
On perpetual markets, set Leverage up to the token's maximum (shown as max). Higher leverage stretches the same capital further but multiplies breakout losses and adds liquidation risk. If you use it, set a stop‑loss. Spot grids have no leverage. See Spot vs perpetual grids.
4. Initial entry: market or limit
By default the grid enters at market when you start it. Optionally set an Initial entry price to start with a limit order instead:
- The grid waits — showing a Pending entry badge — until that first order fills, then places the rest of the grid.
- For a LONG, the current price must be above your limit price; for a SHORT, below. The price must also sit inside the range.
Use this when you'd rather begin at a specific level than wherever price happens to be.
5. Add safety (recommended)
| Field | Purpose | Placement |
|---|---|---|
| Stop-loss | Exit the grid if price runs against you. | LONG: below the lower limit · SHORT: above the upper limit. |
| Close Grid Price | Close the grid when a target is reached, cancelling remaining orders. | LONG: above the upper limit · SHORT: below the lower limit. |
Both are optional but strongly recommended — especially the stop‑loss when using leverage. See Risk and range breakouts.
6. Review and start
Before starting, check the summary: direction, range, number of levels, capital per level, leverage and exits. The app validates your inputs and will flag problems — for example a stop‑loss on the wrong side, a level count that's invalid, or an investment that exceeds your available capital.
A few common validation messages:
- "Investment cannot exceed available capital multiplied by leverage."
- "For LONG, stop-loss must be below the lower limit." (and the SHORT equivalent)
- "Initial entry limit price must stay inside the grid range."
- Spot: "Insufficient spot USDC balance to start the grid (initial buy + first buy level)."
When everything checks out, start the grid. GRIDer places the initial entry and the grid orders, and the strategy goes live.
Already holding the token (spot)? GRIDer will confirm and assure you it trades around your existing balance and will never sell it when the grid closes.
Next: stress‑test first with Backtesting, then watch it in Monitor & manage.